Exposing MCP Tools
Your Stack9 instance already models data as entities, reads as query-library queries, and actions as automations. Instance MCP turns a chosen subset of those into Model Context Protocol tools, served from one secured endpoint that any MCP-compatible AI agent can call.
This guide takes you from "I have a query and an automation" to "an AI agent successfully called both of them" — without writing any integration code.
What You'll Build
An MCP server called my_assistant, exposing two tools:
| Tool | Source type | What the agent can do |
|---|---|---|
getstudents | query | Read student records, with filters and free-text search |
create_support_ticket | automation | Trigger a webhook automation that creates a ticket |
By the end you will have:
- A config file at
src/mcps/my_assistant.json(or the same config authored in the Console) - A working endpoint at
{coreBaseUrl}/api/mcp/my_assistant - Screen and automation permissions that grant exactly the access the agent's user needs
- A successful
tools/callfrom bothcurland an MCP client connected over OAuth
Time to complete: 30-45 minutes
Prerequisites
- A running Stack9 instance (
yarn devor your deployed instance) - At least one query in
src/query-library/that a screen exposes (so it has a screen-query permission) - At least one automation with
triggerType: "webhook"— see Building Workflows - A non-administrator Stack9 user to test with, and an MCP client that supports OAuth (for example Claude Code)
- Conceptual background: MCP Server
How It Works
An MCP server in Stack9 is one JSON config (S9McpConfig) containing a list of tools (S9McpTool). Each tool points at exactly one existing artifact:
src/mcps/my_assistant.json
├── tool "getstudents"           sourceType: query      → src/query-library/getstudents.json
└── tool "create_support_ticket" sourceType: automation → src/automations/create_support_ticket.json
Three things are worth internalising before you start:
- Configs are files, not database rows. They live in
src/mcps/*.jsonand travel with your instance source, exactly like queries and screens. The Console authoring UI reads and writes those same files. - Nothing is exposed implicitly. A query or automation is only reachable over MCP if you list it as a tool.
- Every call is authorised twice — once at the endpoint (an OAuth access token bound to that endpoint) and once per tool (screen-query permission for query tools, automation permission for automation tools). Both fail closed, and tools a caller cannot run are not even listed.
Step 1: Pick a Query to Expose
A query tool is authorised through the screen-query permission of a screen that exposes the query, so pick a query that a screen already uses (as its list or detail query, or in its queries[]). Here is src/query-library/getstudents.json:
{
  "key": "getstudents",
  "name": "getStudents",
  "description": "Retrieves all students",
  "connector": "stack9_api",
  "queryTemplate": {
    "method": "post",
    "path": "/std_student/search",
    "bodyParams": "{\n  \"$where\": { \"_is_deleted\": false },\n  \"$select\": [\"id\", \"name\", \"dob\", \"is_active\"]\n}",
    "queryParams": {
      "page": "{{page}}",
      "limit": "{{limit}}"
    }
  },
  "querySearchFields": ["name"],
  "filters": [
    {
      "name": "Is Active",
      "key": "is_active",
      "typeQueryFilter": "compare",
      "field": "is_active",
      "typeFilter": "BooleanValue",
      "sequence": 1
    }
  ]
}
Three parts of this file decide what arguments the tool will accept:
| Part of the query | Becomes | Example |
|---|---|---|
{{...}} tokens in queryTemplate | Template variables | page, limit |
filters[].key | Equality filters | is_active |
querySearchFields | Free-text search | name |
Arguments that match none of these three are refused with an unknown_arguments error that lists what the tool does accept, so an agent cannot silently get unfiltered results by guessing a filter name.
MCP has no screen in the request, so it considers every screen that exposes the query and allows the call if any of them grants it to the caller. A query that no screen exposes has no permission row and is refused for everyone except administrators (query_not_exposed). If the query is only for the agent, declare it in a screen's queries[] so it gets a configurable permission.
Step 2: Pick a Webhook Automation
Automation tools are the "action" side. The automation must use the webhook trigger type — that is the only trigger type Instance MCP can invoke:
{
  "key": "create_support_ticket",
  "name": "Create Support Ticket",
  "app": "crm",
  "triggerType": "webhook",
  "triggerParams": {
    "method": "post",
    "path": "/create-support-ticket"
  },
  "actions": [
    {
      "key": "create_ticket",
      "name": "Create Ticket",
      "actionTypeKey": "create_entity",
      "params": {
        "entity": "support_ticket",
        "data": {
          "subject": "{{trigger.body.subject}}",
          "body": "{{trigger.body.body}}",
          "priority": "{{trigger.body.priority}}"
        }
      }
    }
  ]
}
The tool runs exactly one automation: the one whose key matches the tool key, or the one named in the tool's automationKey. When the agent calls the tool, the whole arguments object is passed straight through as the automation body — so {{trigger.body.subject}} resolves to the agent's subject argument. The tool returns the output of the automation's last action.
Step 3: Author the MCP Config File
Create src/mcps/my_assistant.json. The filename must match the key:
{
  "key": "my_assistant",
  "name": "My Assistant",
  "description": "Read student data and raise support tickets",
  "tools": [
    {
      "key": "getstudents",
      "name": "getstudents",
      "description": "Search students. Supports is_active filter and name search. Page starts at 0.",
      "sourceType": "query"
    },
    {
      "key": "create_support_ticket",
      "name": "create_support_ticket",
      "description": "Raise a support ticket on behalf of a student",
      "sourceType": "automation",
      "inputSchema": {
        "subject": { "type": "string", "description": "Short summary of the issue" },
        "body": { "type": "string", "description": "Full description" },
        "priority": {
          "type": "string",
          "description": "One of: low, normal, high",
          "optional": true
        }
      }
    }
  ]
}
Field reference for S9McpConfig:
| Field | Type | Required | Notes |
|---|---|---|---|
key | string | yes | Unique. Becomes the URL segment and the filename. |
name | string | yes | Server display name reported to the MCP client. |
description | string | no | Human description. |
tools | array | yes | At least one tool. |
module | string | no | Present only when the config ships from a module — makes it read-only. |
And for each S9McpTool:
| Field | Type | Required | Notes |
|---|---|---|---|
key | string | yes | The query-library key or automation key. Also the MCP tool name the agent calls. |
name | string | yes | The MCP tool title. Conventionally the same as key. |
description | string | no | Shown to the agent — this is your prompt surface. Write it carefully. |
sourceType | query, automation or serverAction | yes | Determines the execution path and the authorisation model. serverAction is for DXP client instances; see the MCP schema reference. |
inputSchema | object | no | Inline schema. Overrides auto-derivation when present. |
automationKey | string | no | automation tools only. The automation to run, when it differs from the tool key. |
Each inline schema field takes type (string, number, boolean, object, array), an optional description, and an optional optional flag.
The agent chooses which tool to call based on description alone. "Retrieves all students. Page starts at 0, not 1." prevents a whole class of failed calls. Treat these strings as part of your prompt engineering, not as documentation.
MCP configs are re-read from disk on every request to the endpoint, so a new or edited file is picked up on the next call — no restart required. Because the Console writes the same files, the two authoring paths in this guide are interchangeable.
Step 4: (Alternative) Author in the Console
The Console writes the same files, so pick whichever path suits you. Navigate to App Builder → MCPs (/app-builder/mcps).
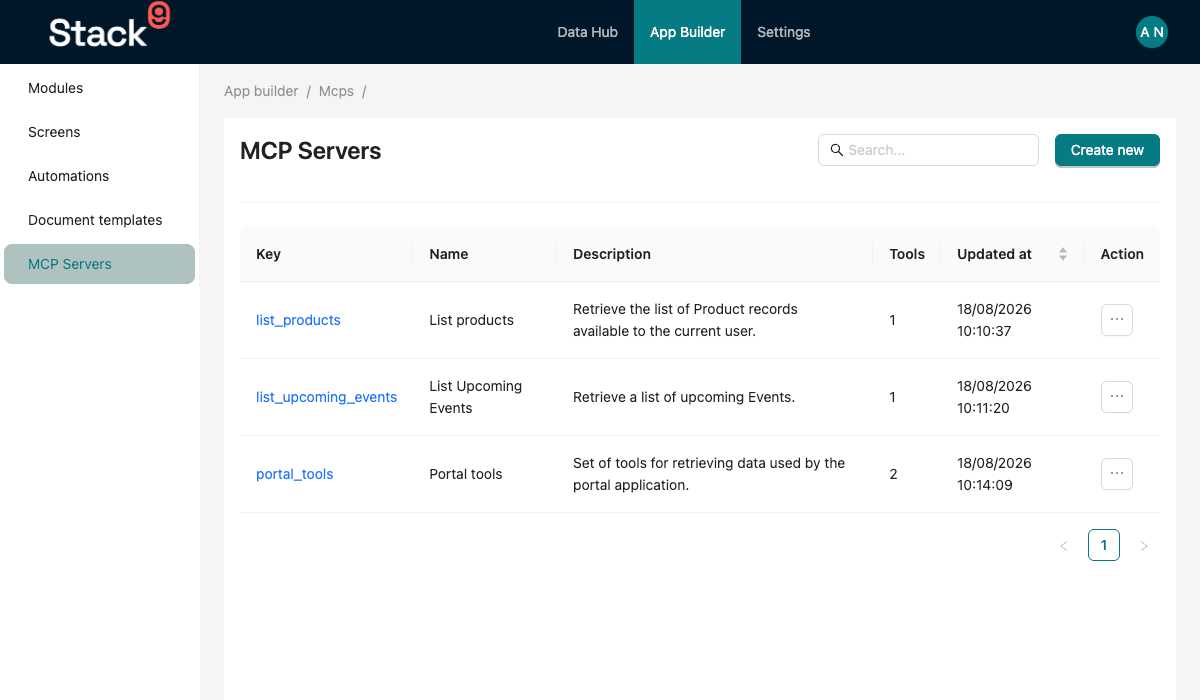
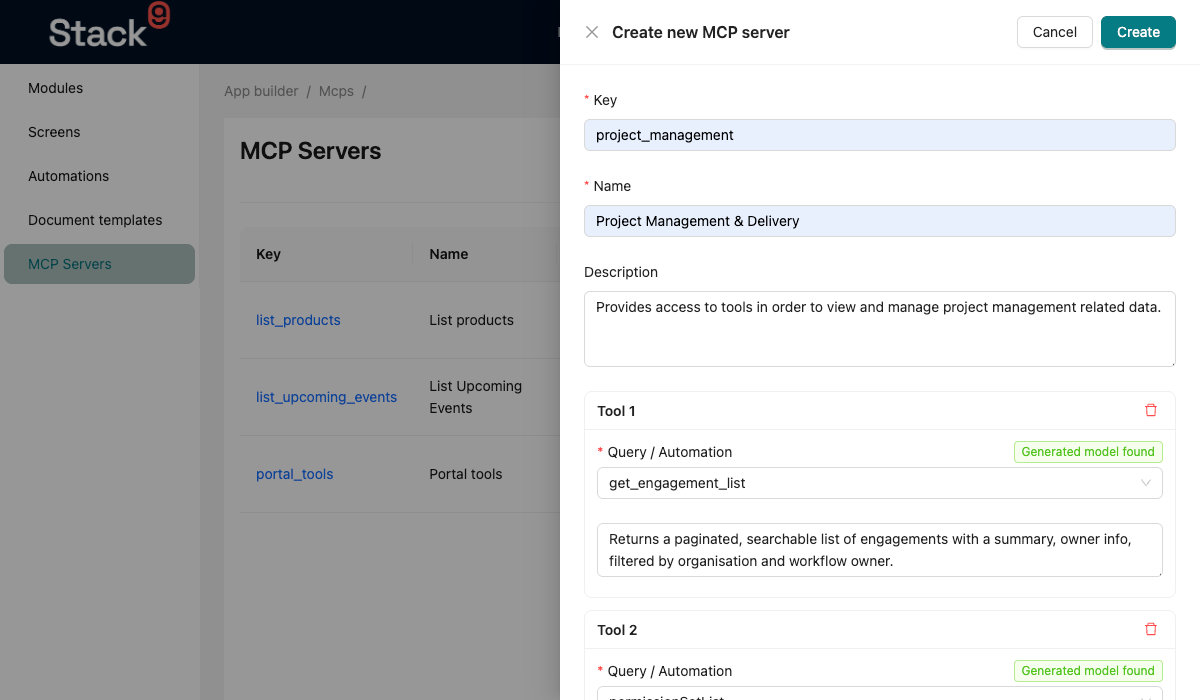
- Click Create and fill in Key, Name, and Description in the Create new MCP server drawer.
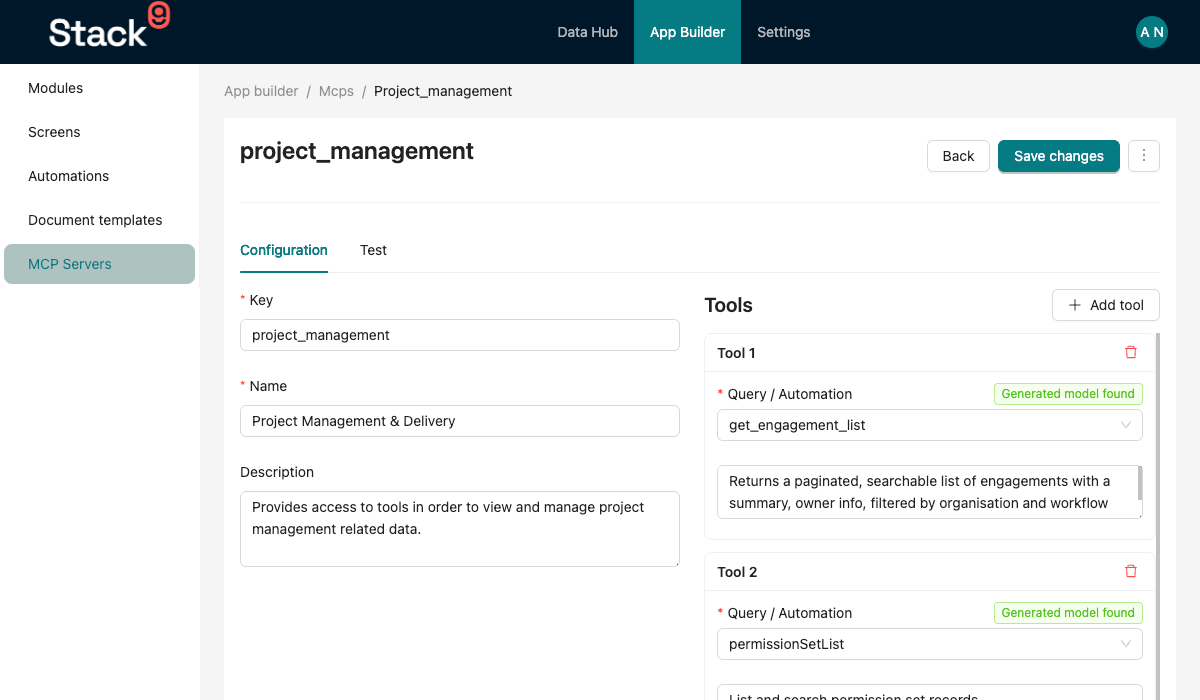
- Open the new server's detail page (
/app-builder/mcps/detail/my_assistant). On the Configuration tab, add a tool and choose its source from the grouped select — the Queries group or the Webhook Automations group. The automation list only contains automations whose trigger type iswebhook.
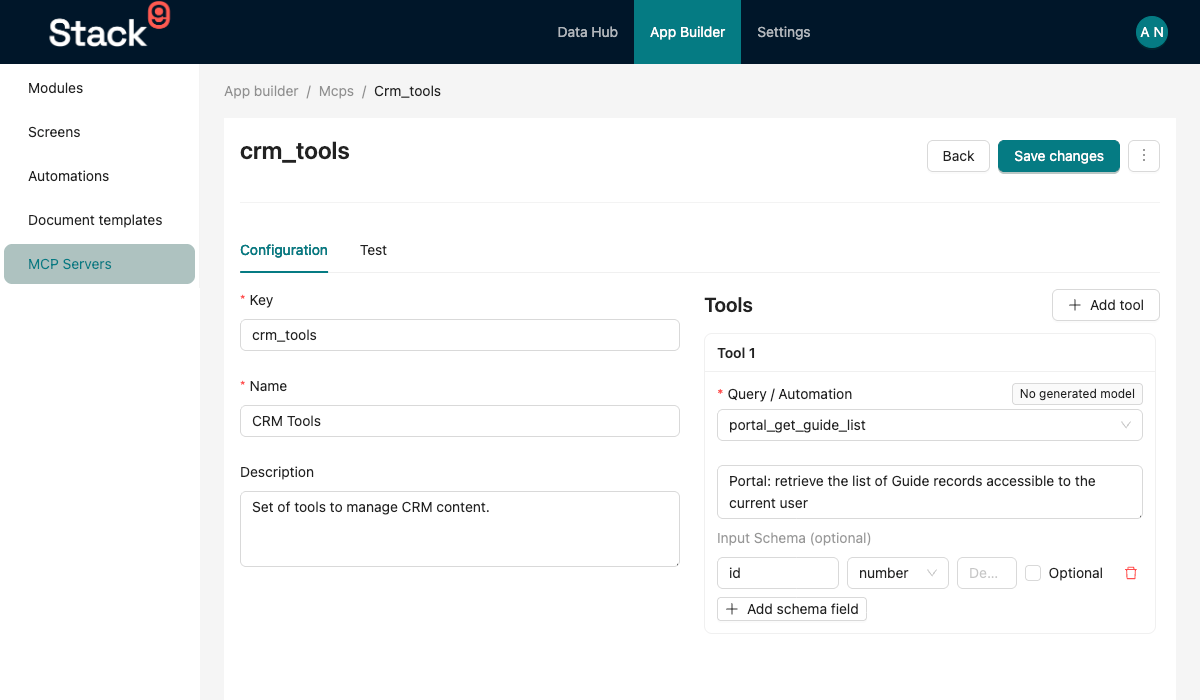
- Watch the badge on each tool card. Generated model found means Stack9 can derive the tool's input schema automatically and the manual schema editor is hidden. No generated model means you should define the schema inline.
- Save. The Console writes
src/mcps/my_assistant.json.
An MCP config that ships from an installed module carries a module field. The Console cannot rename or delete it — attempts return "MCP from module cannot be changed". Copy it into your instance under a new key if you need to change it.
Step 5: Understand How Arguments Are Resolved
The tool's input schema is resolved in this order:
- Inline
inputSchemawins. Converted directly into the tool's argument shape. - Auto-derived for automation tools from the entry action type's
inputcontract, when the automation's first action declares one. - Auto-derived for query tools from generated models. Stack9 PascalCases the tool key and looks for
{Model}PaginatedInput, then{Model}Input, in your instance's generatedstack9-modelspackage. Template variables stay required; filters and search fields are optional; entity field descriptions are carried through as argument descriptions. - Empty — the tool takes no arguments.
Run yarn generate-models if you expect auto-derivation and the Console shows No generated model.
At call time, a query tool partitions the incoming arguments against the query definition:
| Argument matches | Where it goes |
|---|---|
A {{var}} token in the query template | vars |
A filters[].key | An applied filter with operation eq (blank values skipped) |
An entry in querySearchFields | Joined into a single querySearch string |
| Nothing | Refused with an unknown_arguments error |
An automation tool skips all of that: the entire arguments object becomes the automation body.
Step 6: Secure the Endpoint
The endpoint is an OAuth 2.1 protected resource. An MCP client presents a short-lived Bearer access token that is audience-bound to this one endpoint and carries the identity of the Stack9 user who signed in and approved the connection. Session cookies are not read on this route, and anonymous access is impossible. You do not need to mint anything by hand: the client discovers the authorisation server from the endpoint's 401 challenge and runs the flow itself (see Step 9).
Because every call runs as that user, the user's app roles are the whole authorisation story. Each tool is authorised against them on every request:
- Query tools need a screen that exposes the query to grant it at or below the user's access level for that screen's app (
app_screen_permissions, managed in Screen Permissions). Declared screen queries start at the app'sAdminrole; lower the row deliberately to delegate. - Automation tools are evaluated against the automation's
app_automation_permissionsrow. Only a sufficient role (or aPublicrow) proceeds; a missing row is refused.
Do not authorise an agent while signed in as an administrator. Administrators bypass tool privilege checks entirely, so every tool in the MCP config becomes callable. Have the agent's connection approved by a user whose user groups grant only the screen queries and automations it genuinely needs.
Everything else fails closed by design:
- A query exposed on no screen → refused (
query_not_exposed). - A tool whose automation has no permission record → refused (
automation_not_exposed). - A tool the caller cannot run → withheld from
tools/list, and refused if called anyway. - A token minted for another MCP key or environment →
401.
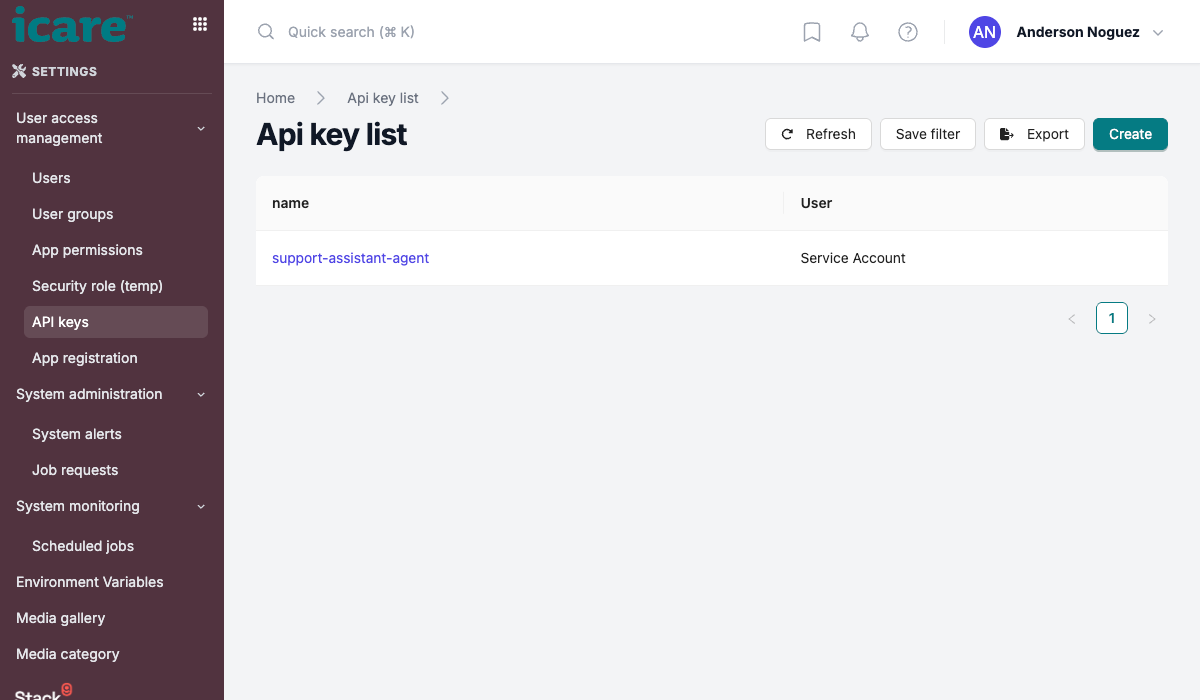
An Api-Key header is still accepted on this endpoint for development and QA, and the calls run as the key's user. It is not advertised in discovery metadata and is not an OAuth mechanism, so do not build production agent connections on it. API keys are managed in the instance settings if you need one for local testing:
Step 7: Get the MCP URL
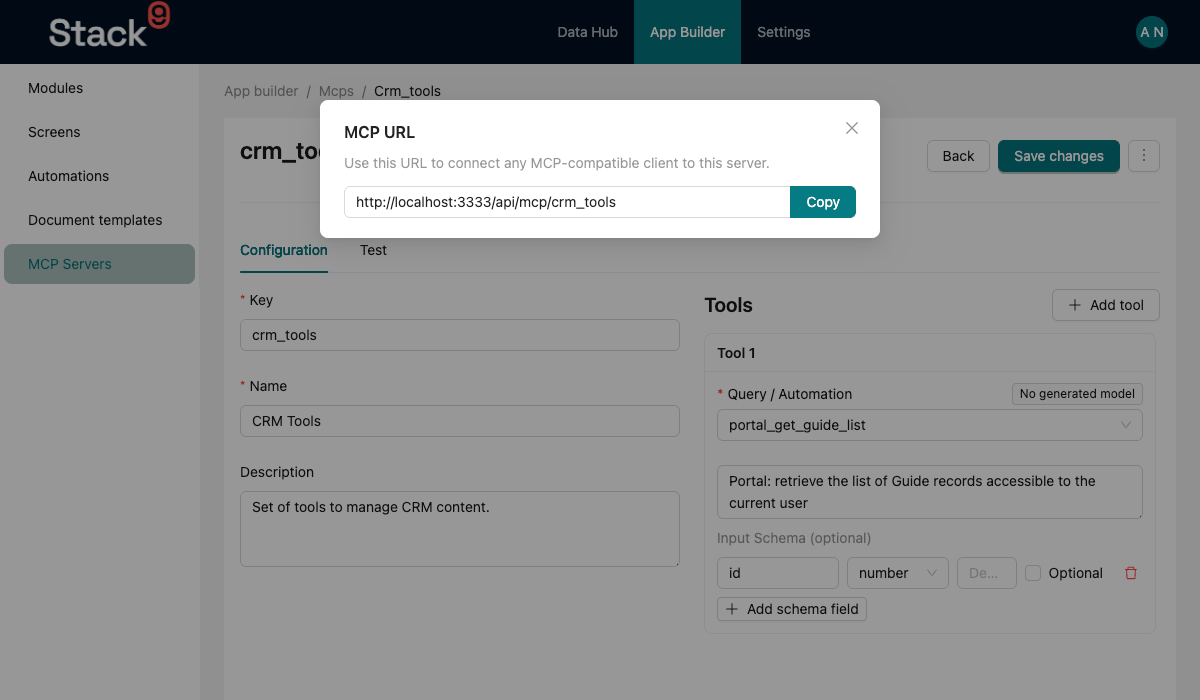
The endpoint is always {coreBaseUrl}/api/mcp/{mcpKey} — for our example, https://core.example.com/api/mcp/my_assistant.
In the Console, use the … dropdown on the MCP detail page and choose Get MCP URL to copy it.
Step 8: Test a Tool Call with curl
The endpoint is stateless: there is no handshake and no session id, and every request stands alone. For a quick local test you can use a development API key rather than running the OAuth flow by hand. Set up your shell first:
export CORE_BASE_URL="http://localhost:4444"
export STACK9_API_KEY="your-dev-api-key"
export MCP_URL="$CORE_BASE_URL/api/mcp/my_assistant"
The examples use the MCP 2026-07-28 request shape: an MCP-Protocol-Version header, an Mcp-Method header naming the JSON-RPC method (plus Mcp-Name for tools/call), and protocol metadata under params._meta. The response body may be SSE-framed (data: {...}) — that is expected.
8a. Check the connection
curl -X POST "$MCP_URL" \
  -H "Api-Key: $STACK9_API_KEY" \
  -H "Content-Type: application/json" \
  -H "Accept: application/json, text/event-stream" \
  -H "MCP-Protocol-Version: 2026-07-28" \
  -H "Mcp-Method: tools/call" \
  -H "Mcp-Name: stack9_whoami" \
  -d '{
    "jsonrpc": "2.0",
    "id": 1,
    "method": "tools/call",
    "params": {
      "name": "stack9_whoami",
      "arguments": {},
      "_meta": {
        "io.modelcontextprotocol/protocolVersion": "2026-07-28",
        "io.modelcontextprotocol/clientInfo": { "name": "curl", "version": "1.0.0" },
        "io.modelcontextprotocol/clientCapabilities": {}
      }
    }
  }'
The built-in stack9_whoami tool returns the instance, environment, base URL, MCP key and the user the call ran as.
8b. List the tools
curl -X POST "$MCP_URL" \
  -H "Api-Key: $STACK9_API_KEY" \
  -H "Content-Type: application/json" \
  -H "Accept: application/json, text/event-stream" \
  -H "MCP-Protocol-Version: 2026-07-28" \
  -H "Mcp-Method: tools/list" \
  -d '{
    "jsonrpc": "2.0",
    "id": 2,
    "method": "tools/list",
    "params": {
      "_meta": {
        "io.modelcontextprotocol/protocolVersion": "2026-07-28",
        "io.modelcontextprotocol/clientInfo": { "name": "curl", "version": "1.0.0" },
        "io.modelcontextprotocol/clientCapabilities": {}
      }
    }
  }'
You should see the tools this user may run, with the titles and descriptions from your config and the resolved input schemas, plus stack9_whoami. A tool missing from the list is one the user is not authorised for.
8c. Call the query tool
Send the same headers with Mcp-Method: tools/call and Mcp-Name: getstudents, and this body:
{
  "jsonrpc": "2.0",
  "id": 3,
  "method": "tools/call",
  "params": {
    "name": "getstudents",
    "arguments": { "page": 0, "limit": 5, "is_active": true, "name": "smith" },
    "_meta": {
      "io.modelcontextprotocol/protocolVersion": "2026-07-28",
      "io.modelcontextprotocol/clientInfo": { "name": "curl", "version": "1.0.0" },
      "io.modelcontextprotocol/clientCapabilities": {}
    }
  }
}
Results are returned as a single text block containing JSON:
{
  "jsonrpc": "2.0",
  "id": 3,
  "result": {
    "content": [
      {
        "type": "text",
        "text": "{\"total\":1,\"totalPages\":1,\"results\":[{\"id\":42,\"name\":\"Jane Smith\",\"is_active\":true}]}"
      }
    ]
  }
}
8d. Call the automation tool
With Mcp-Name: create_support_ticket:
{
  "jsonrpc": "2.0",
  "id": 4,
  "method": "tools/call",
  "params": {
    "name": "create_support_ticket",
    "arguments": {
      "subject": "Cannot access portal",
      "body": "Student reports a 403 on login since this morning.",
      "priority": "high"
    },
    "_meta": {
      "io.modelcontextprotocol/protocolVersion": "2026-07-28",
      "io.modelcontextprotocol/clientInfo": { "name": "curl", "version": "1.0.0" },
      "io.modelcontextprotocol/clientCapabilities": {}
    }
  }
}
Or use the built-in Test tab
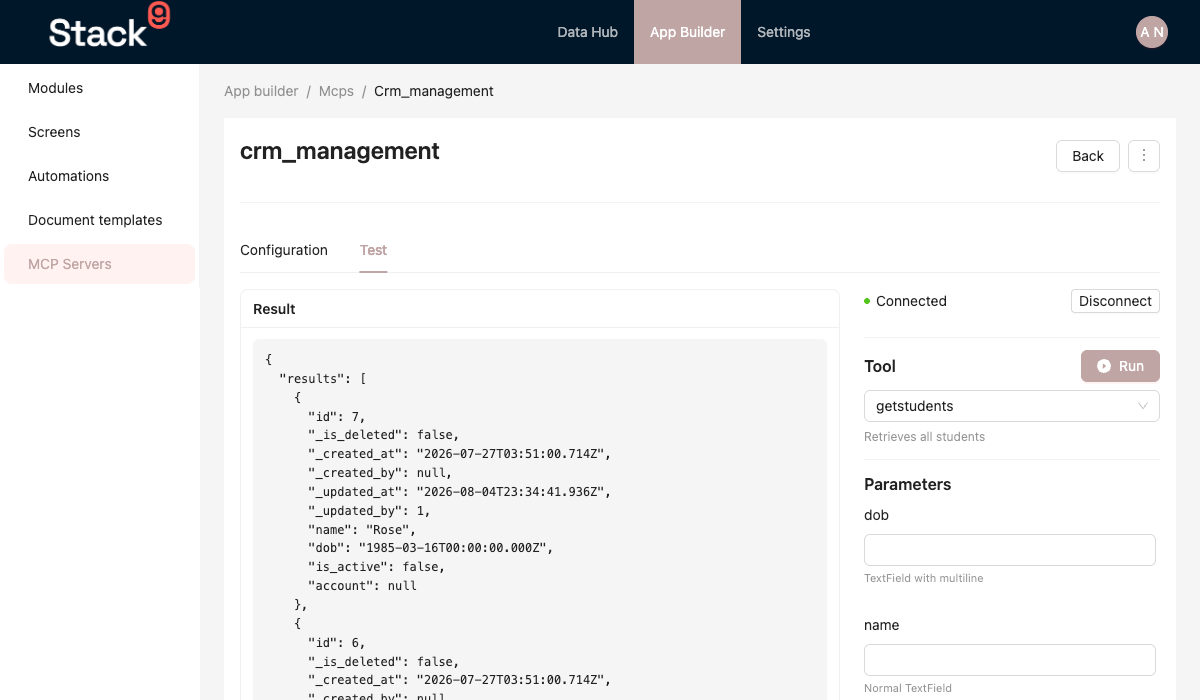
The Console's Test tab on the MCP detail page is a real MCP client: connect, list tools, fill in parameters, run, and read the JSON result or error. It runs against the console server's copy of the MCP handler (development only) as a fixed administrator, so it is the fastest way to confirm a config works, but it cannot show you a permission denial. Check per-user behaviour by connecting a non-administrator over OAuth.
Step 9: Connect an MCP Client
Point your client at the endpoint using the Streamable HTTP transport and pass no credential. The client calls the endpoint, receives a 401 with a WWW-Authenticate challenge, discovers Stack9's authorisation server from the protected-resource metadata, and opens a browser so the user can sign in through Stack9's normal login and approve the connection. For Claude Code:
claude mcp add --transport http stack9-my-assistant https://core.example.com/api/mcp/my_assistant
Then run /mcp inside Claude Code to complete sign-in. The access token lasts 15 minutes and the client renews it with its refresh token.
Stack9 supports clients that register through a Client ID Metadata Document and clients pre-registered as an app_registration. It does not offer Dynamic Client Registration. A client that only supports DCR must be pre-registered. Confidential clients whose OAuth stack cannot send resource or PKCE (such as Amazon Bedrock AgentCore's outbound provider) have specific accommodations. All of this is covered in Connect Claude Code to a Stack9 MCP endpoint.
Once connected, ask the agent something that requires the data, for example "How many active students match 'smith'?". The agent should call getstudents and answer from the result.
Current Limitations
- Only
toolsare exposed. The MCPresourcesandpromptscollections are empty today. - Requests are stateless. Multiple core replicas need no sticky routing for MCP traffic; OAuth grant state lives in the shared Redis cache.
- No MCP-specific rate limiting.
Troubleshooting
401 with a WWW-Authenticate challenge
The request carried no acceptable credential. Before the OAuth flow completes this is expected — it is how the client discovers where to sign in. After it: the access token carries no aud claim means a session token was sent instead of an OAuth access token; the access token is not audience-bound to … means the token was issued for another MCP key or host. Session cookies are never accepted here.
403 with error="insufficient_scope"
The token lacks the mcp:tools scope. Re-authorise requesting it.
404 MCP 'my_assistant' not found
The config was not found on disk. Confirm the file is at src/mcps/my_assistant.json, that its key matches both the filename and the URL segment, and — in a deployed instance — that the file was included in the build you shipped. Duplicate keys are de-duplicated on load and the first file wins, so also check whether an installed module ships the same key.
A tool is missing from tools/list
The connected user is not authorised to run it, so it is withheld. For a query tool, check that a screen exposes the query and grants it at or below the user's access level for that app. For an automation tool, check its app_automation_permissions row. The server logs mcp: tools withheld from this principal with the tool keys.
Authorization error (query_not_exposed)
No screen exposes the query, so it has no screen-query permission. Declare it on a screen (for example in queries[]) and grant it in Screen Permissions.
Authorization error (insufficient_app_role) or (no_app_role)
The user's access level for the owning app is below the required role, or the user has no access to that app at all. Grant it deliberately through the user's groups, or lower the query's role on the exposing screen.
Authorization error (automation_not_exposed)
No app_automation_permissions record exists for the automation. Grant the automation permission for the user's group, or mark its access level Public if it is genuinely safe to expose.
The tool takes no arguments when you expected some
Auto-derivation found no generated model. Run yarn generate-models, or define an inline inputSchema. Remember the key-to-model convention: the tool key is PascalCased by splitting on _ only, so an all-lowercase key like getalldevelopers looks for Getalldevelopers{,Paginated}Input (matched case-insensitively).
Argument error (unknown_arguments)
An argument matched no template variable, filter key or search field of the query. The error lists the accepted arguments; cross-check your inline schema field names against the query definition.
Next Steps
- MCP Server concepts — the full architecture and security reference
- Connect Claude Code to a Stack9 MCP endpoint — the OAuth flow and client registration in detail
- Building Workflows — build the webhook automations you expose as action tools
- Custom Queries — write the queries you expose as read tools
- Executing Queries — filters, search fields, and template variables in depth